Long exposure photos are one of my favorite to take and to look at.This technique is very self explanatory, you want to set you camera for a long exposure time so it can capture all the available light.
One of my favorite parts of this technique is "painting" with light. Basically all you do is "paint" with a flashlight/lighter a picture, while the camera is taking the photo.
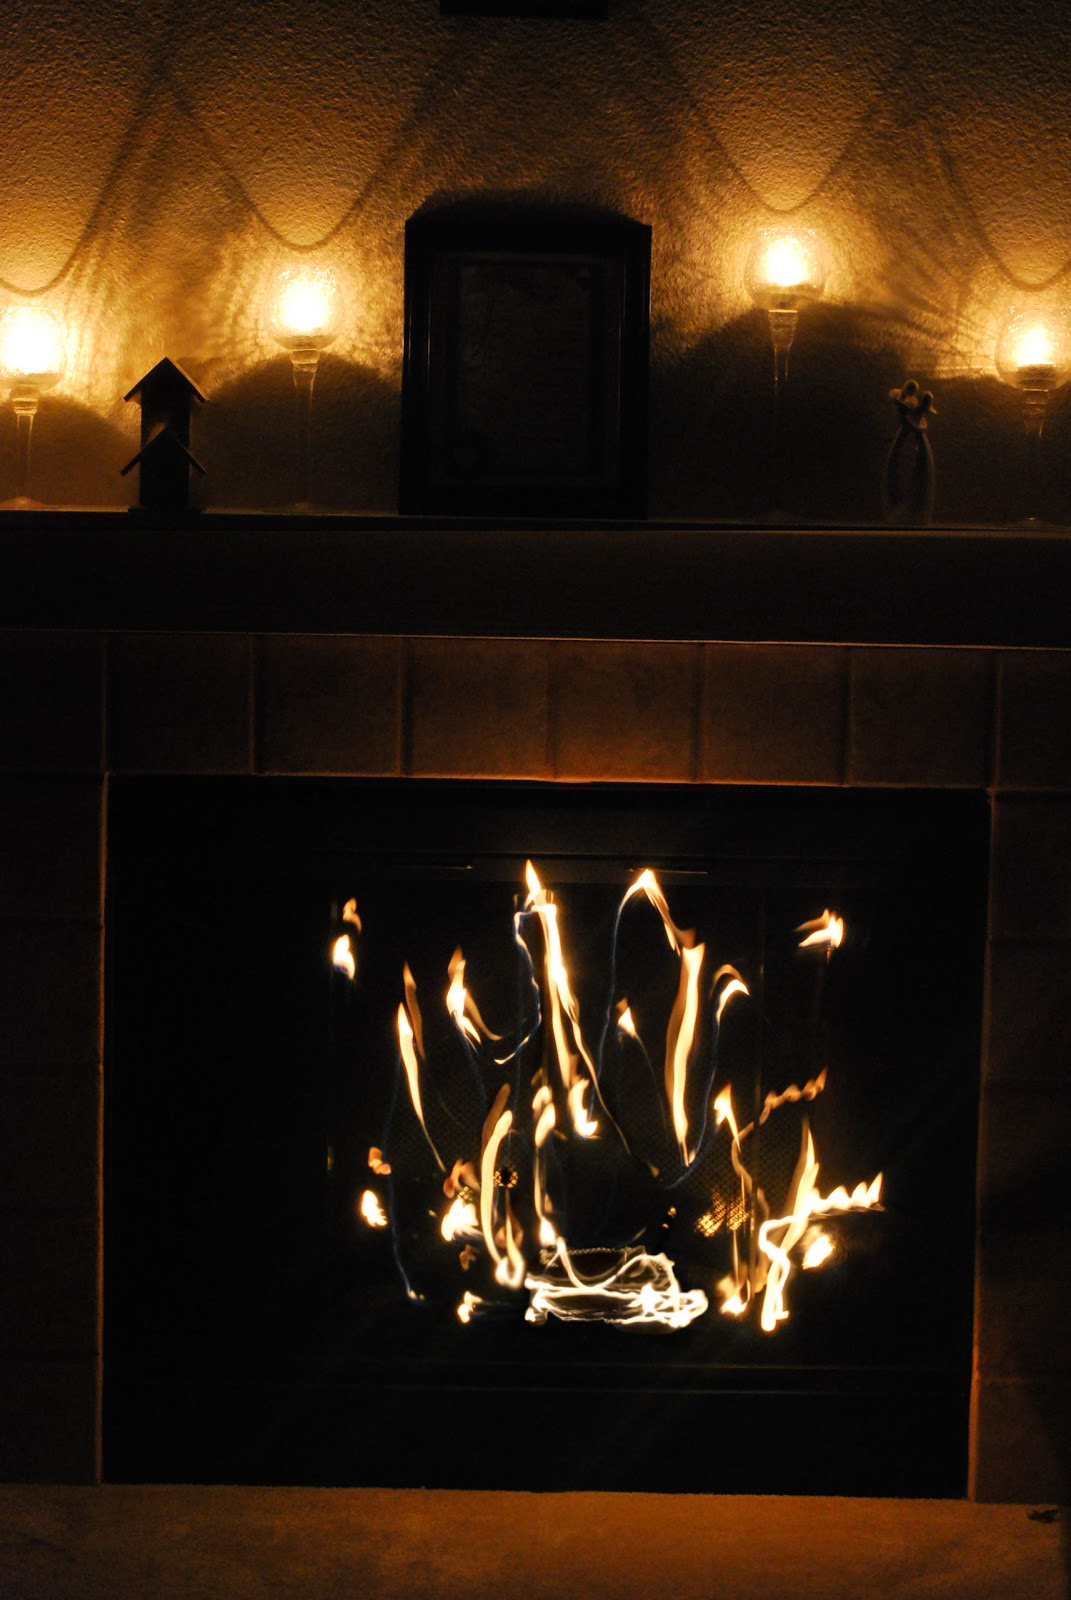
These are two finished photo's from my living room fireplace. For these two photo's I took multiple exposures of the same area with different parts lit up, then combined them together. The reason I decided to put both in the blog is because I cannot decide which one I like better. I used 3 exposures for each final product.
The one in the right I just drew in the fire. The one on the right is the same original fire but on the mantle I also highlighted the frame, birdhouse, and figure. Let me know what one you like better and why! :)

Here's how I did it:
Step One: Set up my tripod and took these 4 photos:


To take these photo's I set my camera for a 30 second exposure time and f/22(If you want a more technical explanation of what an f/stop is, you can read this article http://en.wikipedia.org/wiki/F-number). I did not have my wireless remote, so I had to hit the button then run to the other side of my living room with the lighter(not lit until I got to the fireplace, we must practice safe photography) this is why some are a little shaky. I am sure if my neighbors saw what I was doing they probably would have thought I was crazy, thank goodness for blinds.
Step Two: I uploaded them into Photoshop and pretty much cut and paste them together. The tops of the photo's were pretty easy to transfer over:


The bottom was a little trickier, mostly because when I first transferred it over it was too big and just looked like it did not belong, so I re-sized it and used the blur tool to blend it all together like this:

Make sure when you go to blend together the layers you select "all layers".

The after that, just make sure all of the new additions to your photo don't leave any unsightly lines that are going to give away the fact that everything was not originally one photo. If you have any of these lines and they are not too noticeable, try to use the blur tool to blur it together.If that doesn't work with out destroying the photo try re-selecting and re-copying over the section of photo you want.

Another popular use of long exposure photography is for taking photos of moving water(rivers, waterfalls, etc.) I don't have an example of one of these photo's right now, but I will try to post one soon.
No comments:
Post a Comment